
Are Non-Encrypted Emails Secure?
Simply put, email encryption is a way to send secure messages to your intended recipient. You might be asking yourself, “Why would I need to encrypt my emails? Aren’t emails secure to begin with?” The short answer is “no” – emails are not entirely secure, and there are many circumstances in which you should be encrypting the emails that you are sending back and forth.
In this article, we will cover:
- what information you should be encrypting;
- how to send encrypted emails in the Outlook app;
- how to encrypt emails in the Outlook web portal;
- how to open encrypted emails in Outlook;
- how to open encrypted emails in Gmail; and
- how to open encrypted emails in other email providers.
What Emails Need Encryption?
An analogy that we like to use here at Blackink IT is that sending a non-encrypted email is like sending a postcard in the mail without an envelope – whatever is written on that postcard can be easily read by anyone who sees your postcard on the way to its destination. There are many circumstances in which sending a message like this is perfectly acceptable, but you most likely wouldn’t feel comfortable putting sensitive information on that postcard.
Sending emails should be handled the exact same way. If the information you’re sending in your email could cause damage to you or your company by falling into the wrong hands, you should encrypt that email before sending. As you’ll see, encrypting emails is quite simple, so we would recommend erring on the side of caution if you believe that there might be some sensitive information involved in your communication.
Here are just some examples of information that would require encryption:
- Financial data
- Personal Identification Information (PII)
- Intellectual Property (IP)
- Protected Health Information (PHI)
Encrypting Emails in the Outlook App
To craft a new email, open the outlook email application and select “New Email” in the top left of the home tab.

Once your new email is open, you should see the “Encrypt” button (which appears with a padlock icon) show up under the message tab. If you don’t see the Encrypt button, switch over to the options tab, and the Encrypt button should appear on the banner. We highly recommend encrypting your email before typing – this will help you avoid forgetting to encrypt your email and accidentally hitting send without protecting your sensitive information.
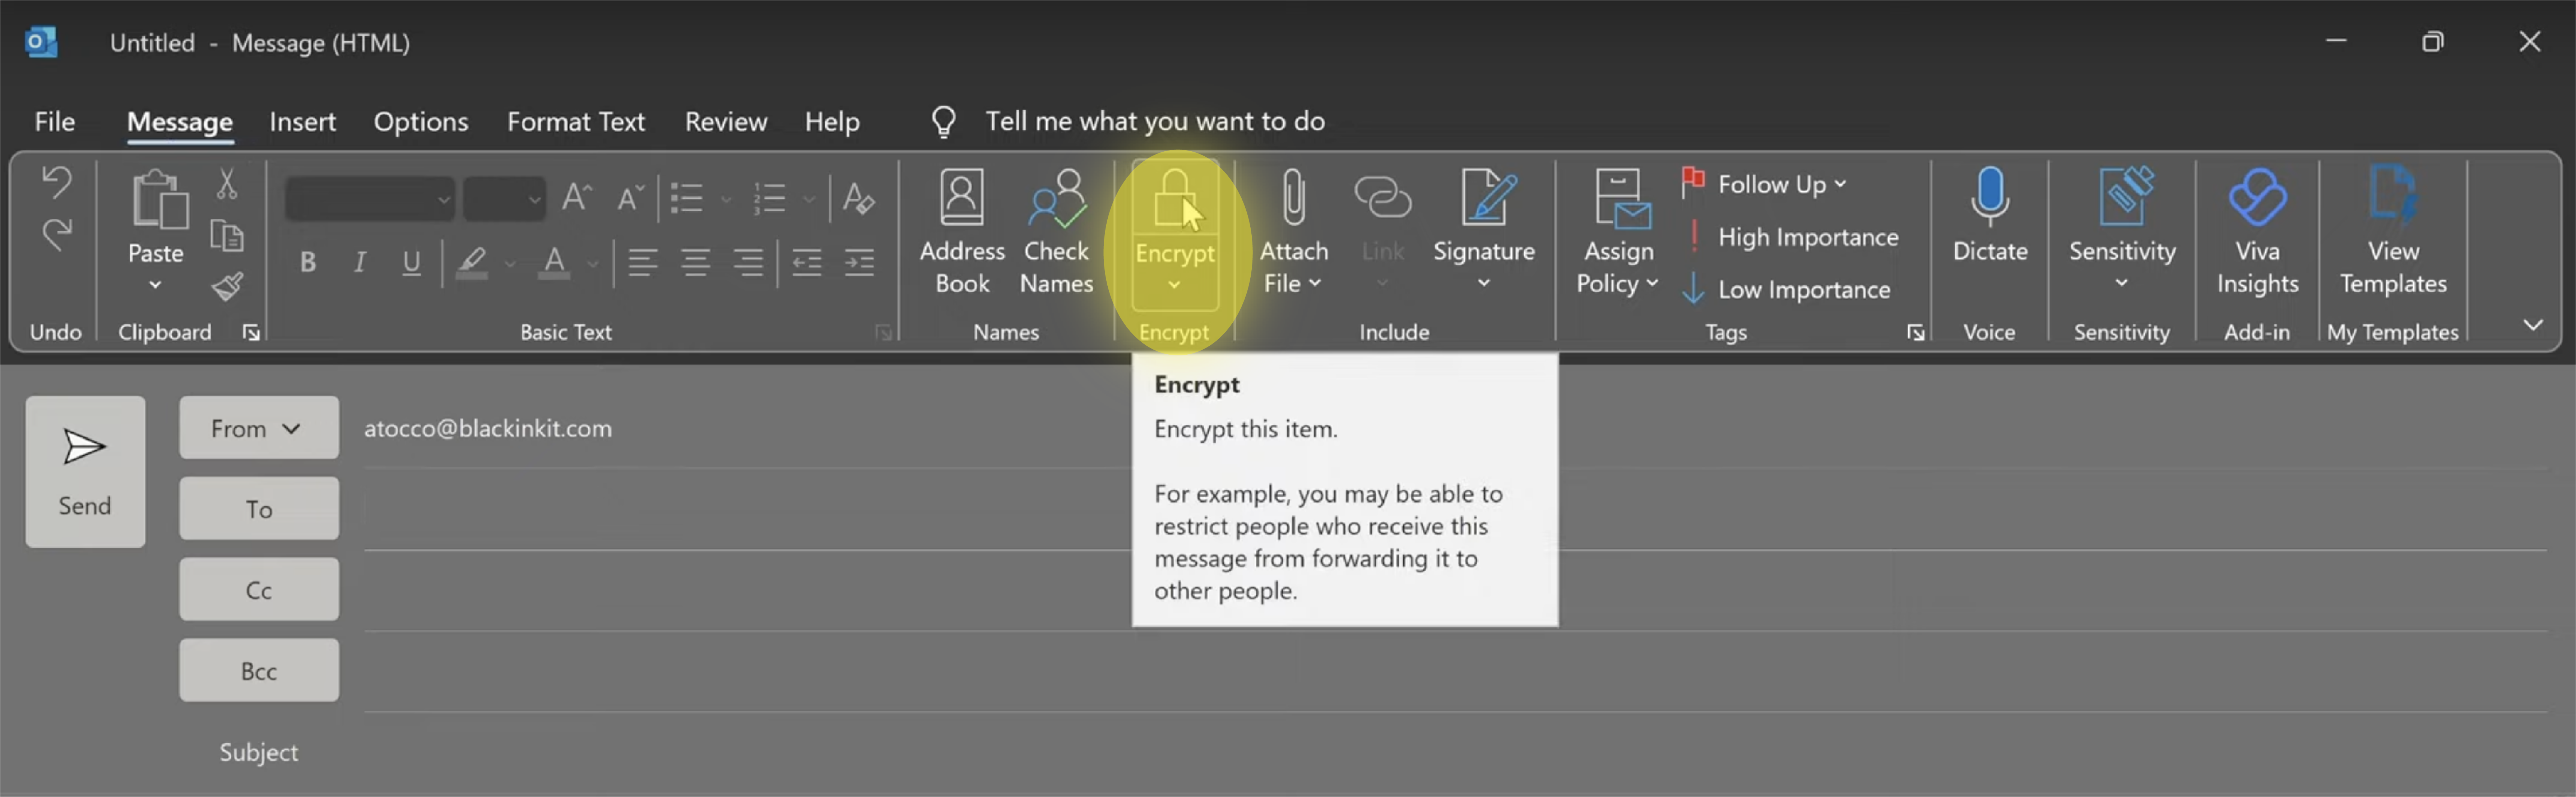
You can either select the Encrypt button to apply regular encryption, or you can press the drop-down arrow under the Encrypt button to reveal two options. The first option is “Encrypt-Only,” which is just standard encryption. The second option is “Do Not Forward,” which acts slightly different than Encrypt-Only. Do Not Forward, as one might guess, removes the recipient’s ability to forward the email; Do Not Forward also removes their ability to print or copy the contents of the message. There are some scenarios where these options make sense, so be sure to think about what abilities you want to allow before selecting your encryption option. (Note: the Outlook application for Mac does differ from the Windows version. For Mac, the Encrypt options can be found by selecting “New Message” and clicking “Draft” in the top menu bar. The encrypt options will appear in this drop-down.)
Once you’ve applied encryption, it’s as simple as writing your email as normal! There are no extra steps to be taken, which makes protecting your information incredibly straightforward.
Encrypting Emails in Outlook Web Version
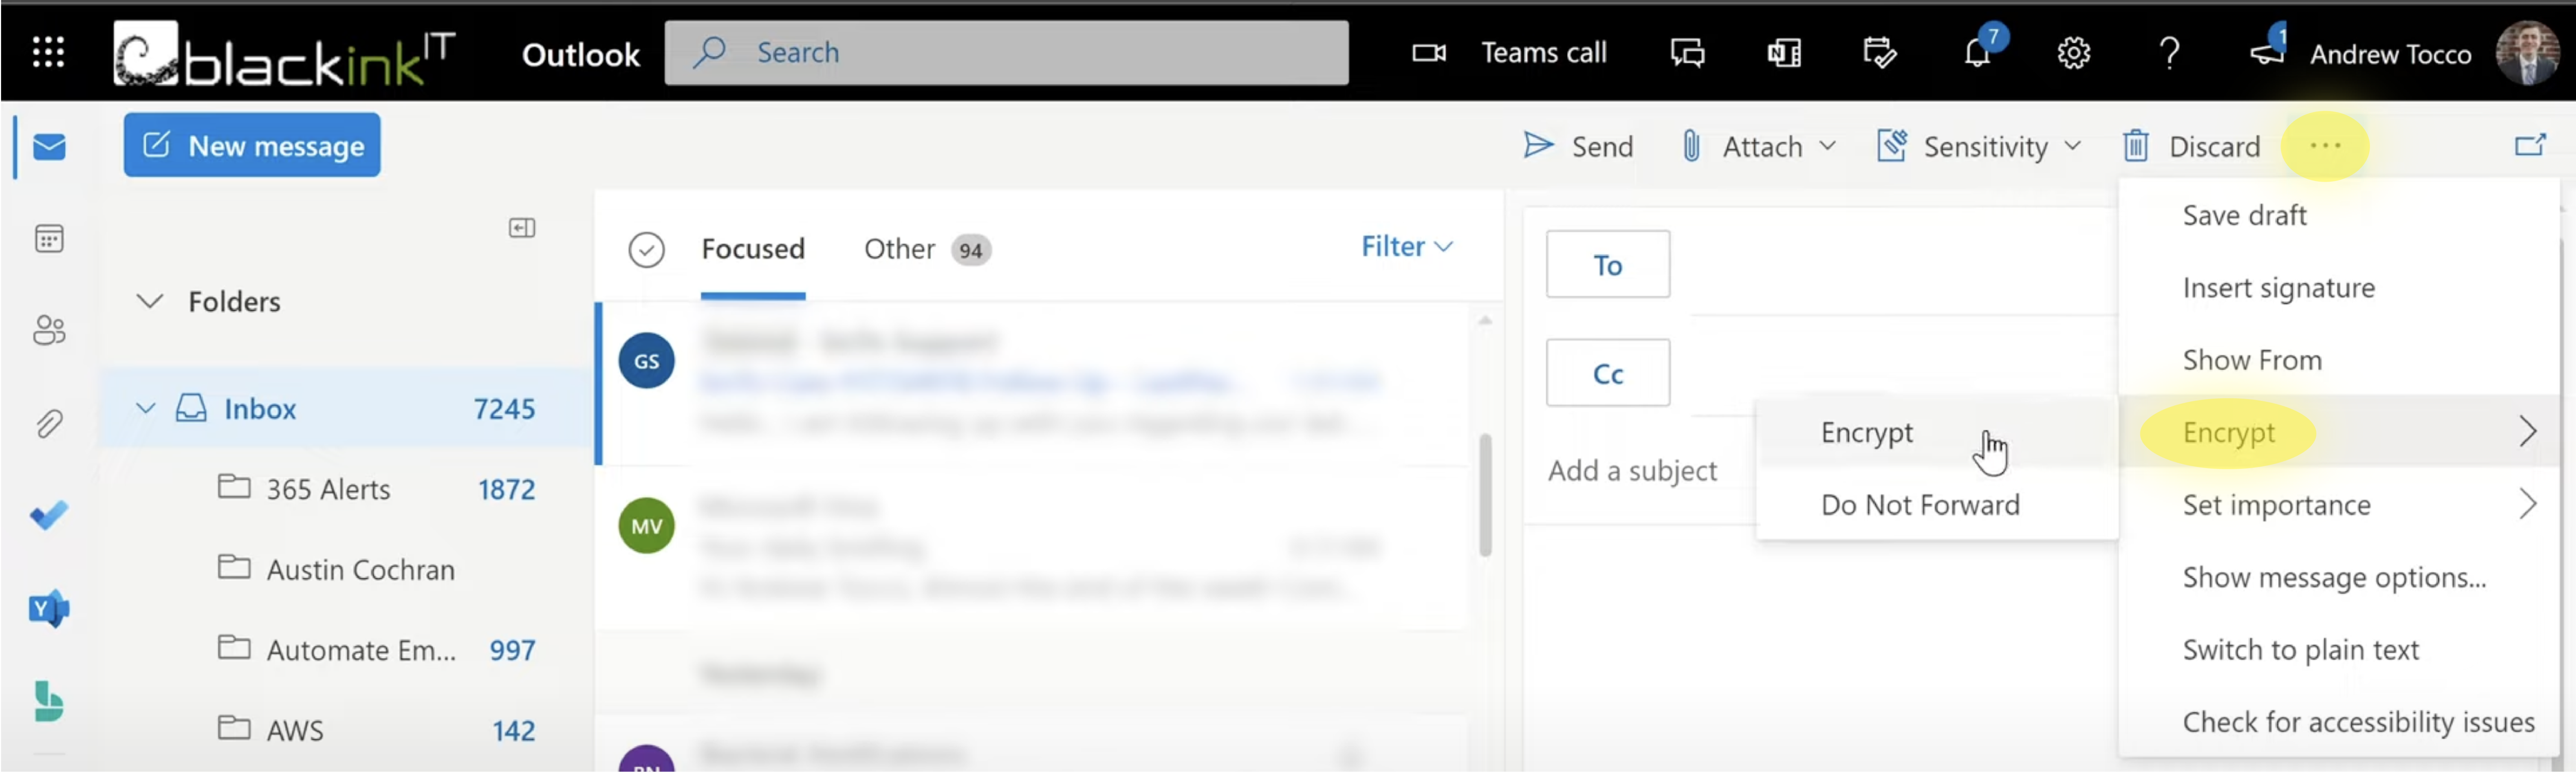
If you are using the web version of Outlook, you will follow a very similar process – however, there are slight differences in the interface. Once you open the Outlook web portal, you’ll click the “New Email” button, just as you would in the Outlook application. Your email draft will open on the right side of the screen, and a few options will appear on the banner above the email. The “Encrypt” padlock icon might appear right away, but it is possible that you’ll have to click on the ellipsis button, which opens a drop-down menu. In this drop-down, you’ll see “Encrypt,” which will open the same encryption options that we saw in the Outlook application. From here, the process is identical to working in the Windows application.
Opening Encrypted Emails in Outlook
We’ve covered how to send encrypted emails from Outlook, but on the receiving end, how do recipients read encrypted emails? The answer to this question depends on which email provider the recipient uses, but regardless of which email it’s sent to, opening an encrypted message is simple.
In the Office 365 Outlook application, reading encrypted emails is incredibly simple. A small padlock will appear next to emails you receive to indicate that they are encrypted. To open these messages, simply click on the email, and it should show up natively in the read pane on the right side of your screen. If it doesn’t show up, then you can double-click the email to open it up into a new window.

Opening Encrypted Emails in Gmail
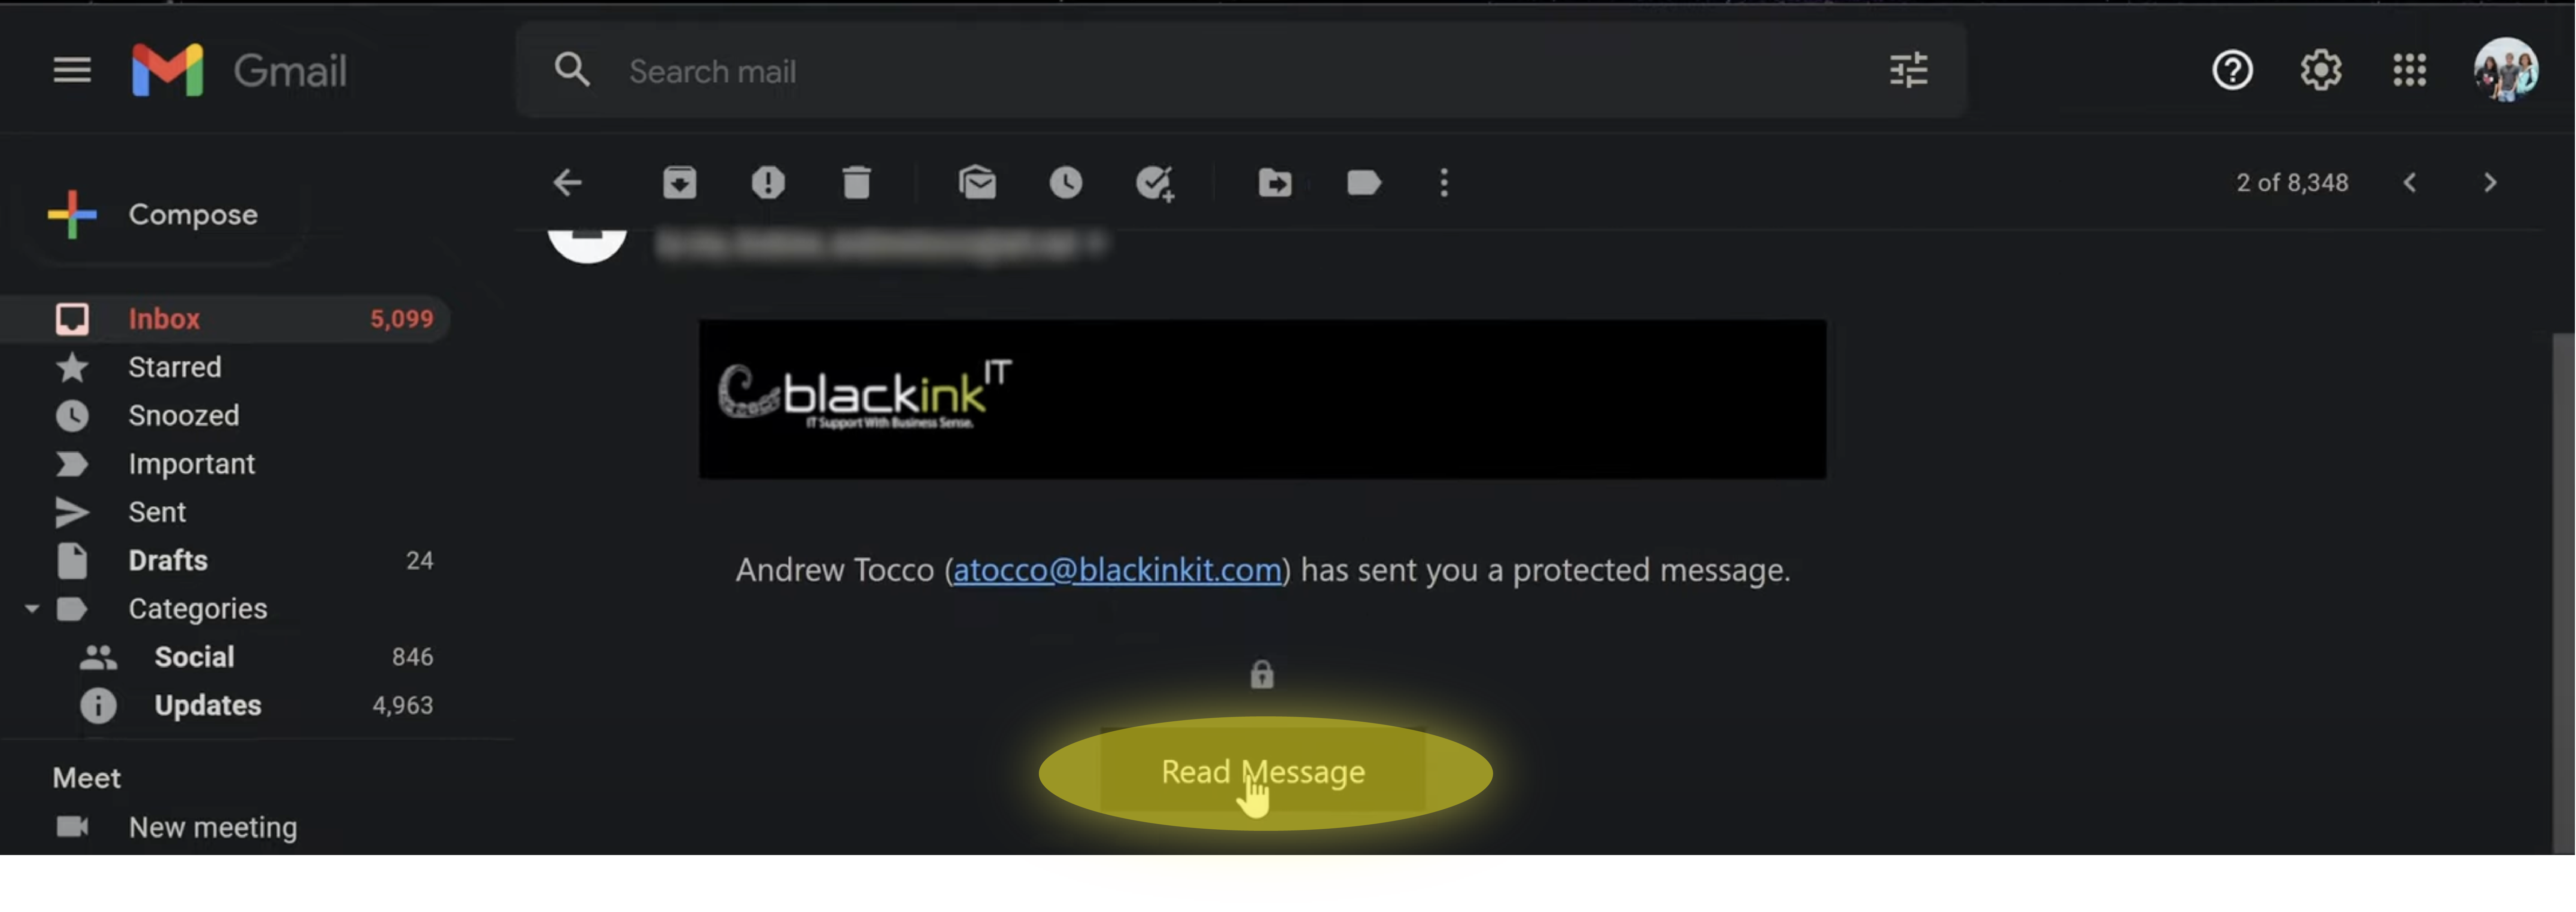
If you are opening an encrypted email in Gmail, you’ll begin by selecting the email you want to read. Gmail will then open a message that doesn’t show the email you’ve been sent, but instead, shows a screen that lets you know that you’ve been sent an encrypted message. This message will also include a “Read Message” button. Clicking this will open a new window that presents two options: “Sign in with Google” and “Sign in with a One-time passcode.”
The “sign in with Google” button is often a quicker option, because your browser will likely recognize that you’re logged into Gmail in another tab. This will open the message right away without prompting you for any more information.

Opening an Encrypted Email in Other Email Providers
As for most other email providers, you will be shown a screen that prompts you with a “Sign in with a One-time passcode” button.
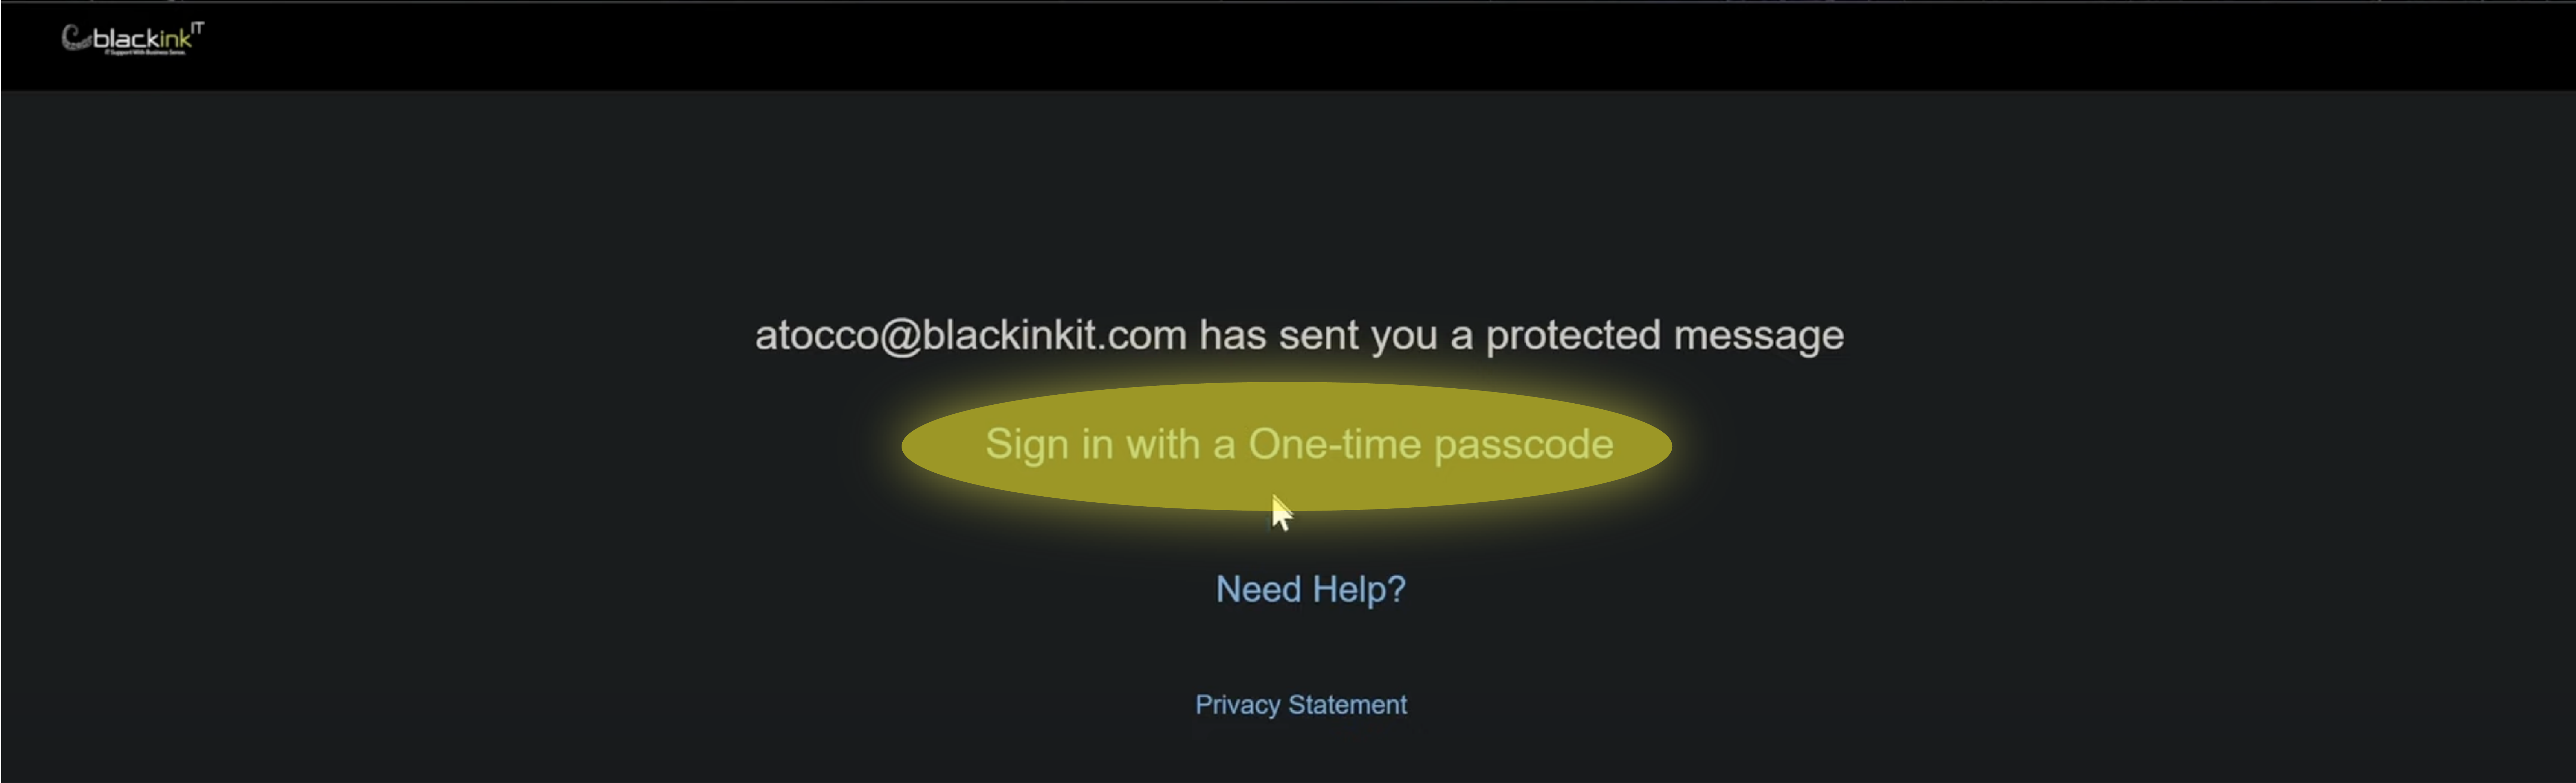
Clicking this button will send a one-time passcode to your email, and open a screen that provides a space to type that passcode in. Navigating back to your email inbox, opening the email with the one-time passcode, and then pasting that passcode into the text box will allow you to view the encrypted email that you were sent. If for some reason you don’t see the email containing the one-time-passcode, be sure to check your junk or spam mailboxes.

The Importance of Email Encryption
To properly protect personal and company information, it is important to know the basics of email encryption. In this article, we've covered what information you should encrypt, how to encrypt it in Outlook, and how to open encrypted emails using various email providers - all of this information is essential to staying safe and productive. Here at Blackink IT, our mission is to keep organization's safe and productive. Our team of IT and security experts is able to do this by assisting businesses in maximizing their resources to reach their full potential.
Interested in learning more? Reach out today - we're excited to meet you!


.png)


